 en
en de
de cn
cn fr
fr it
it es
es- Sets
Arduino for dummies
Today I (being a complete beginner regarding Arduino) try to explain the Arduino Nano to soon-to-be programmers.
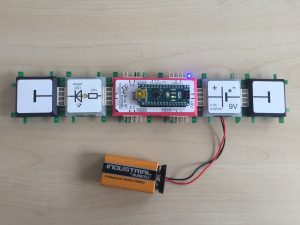
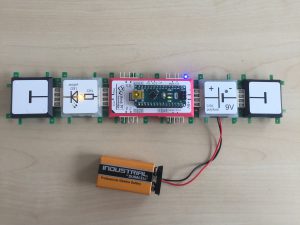
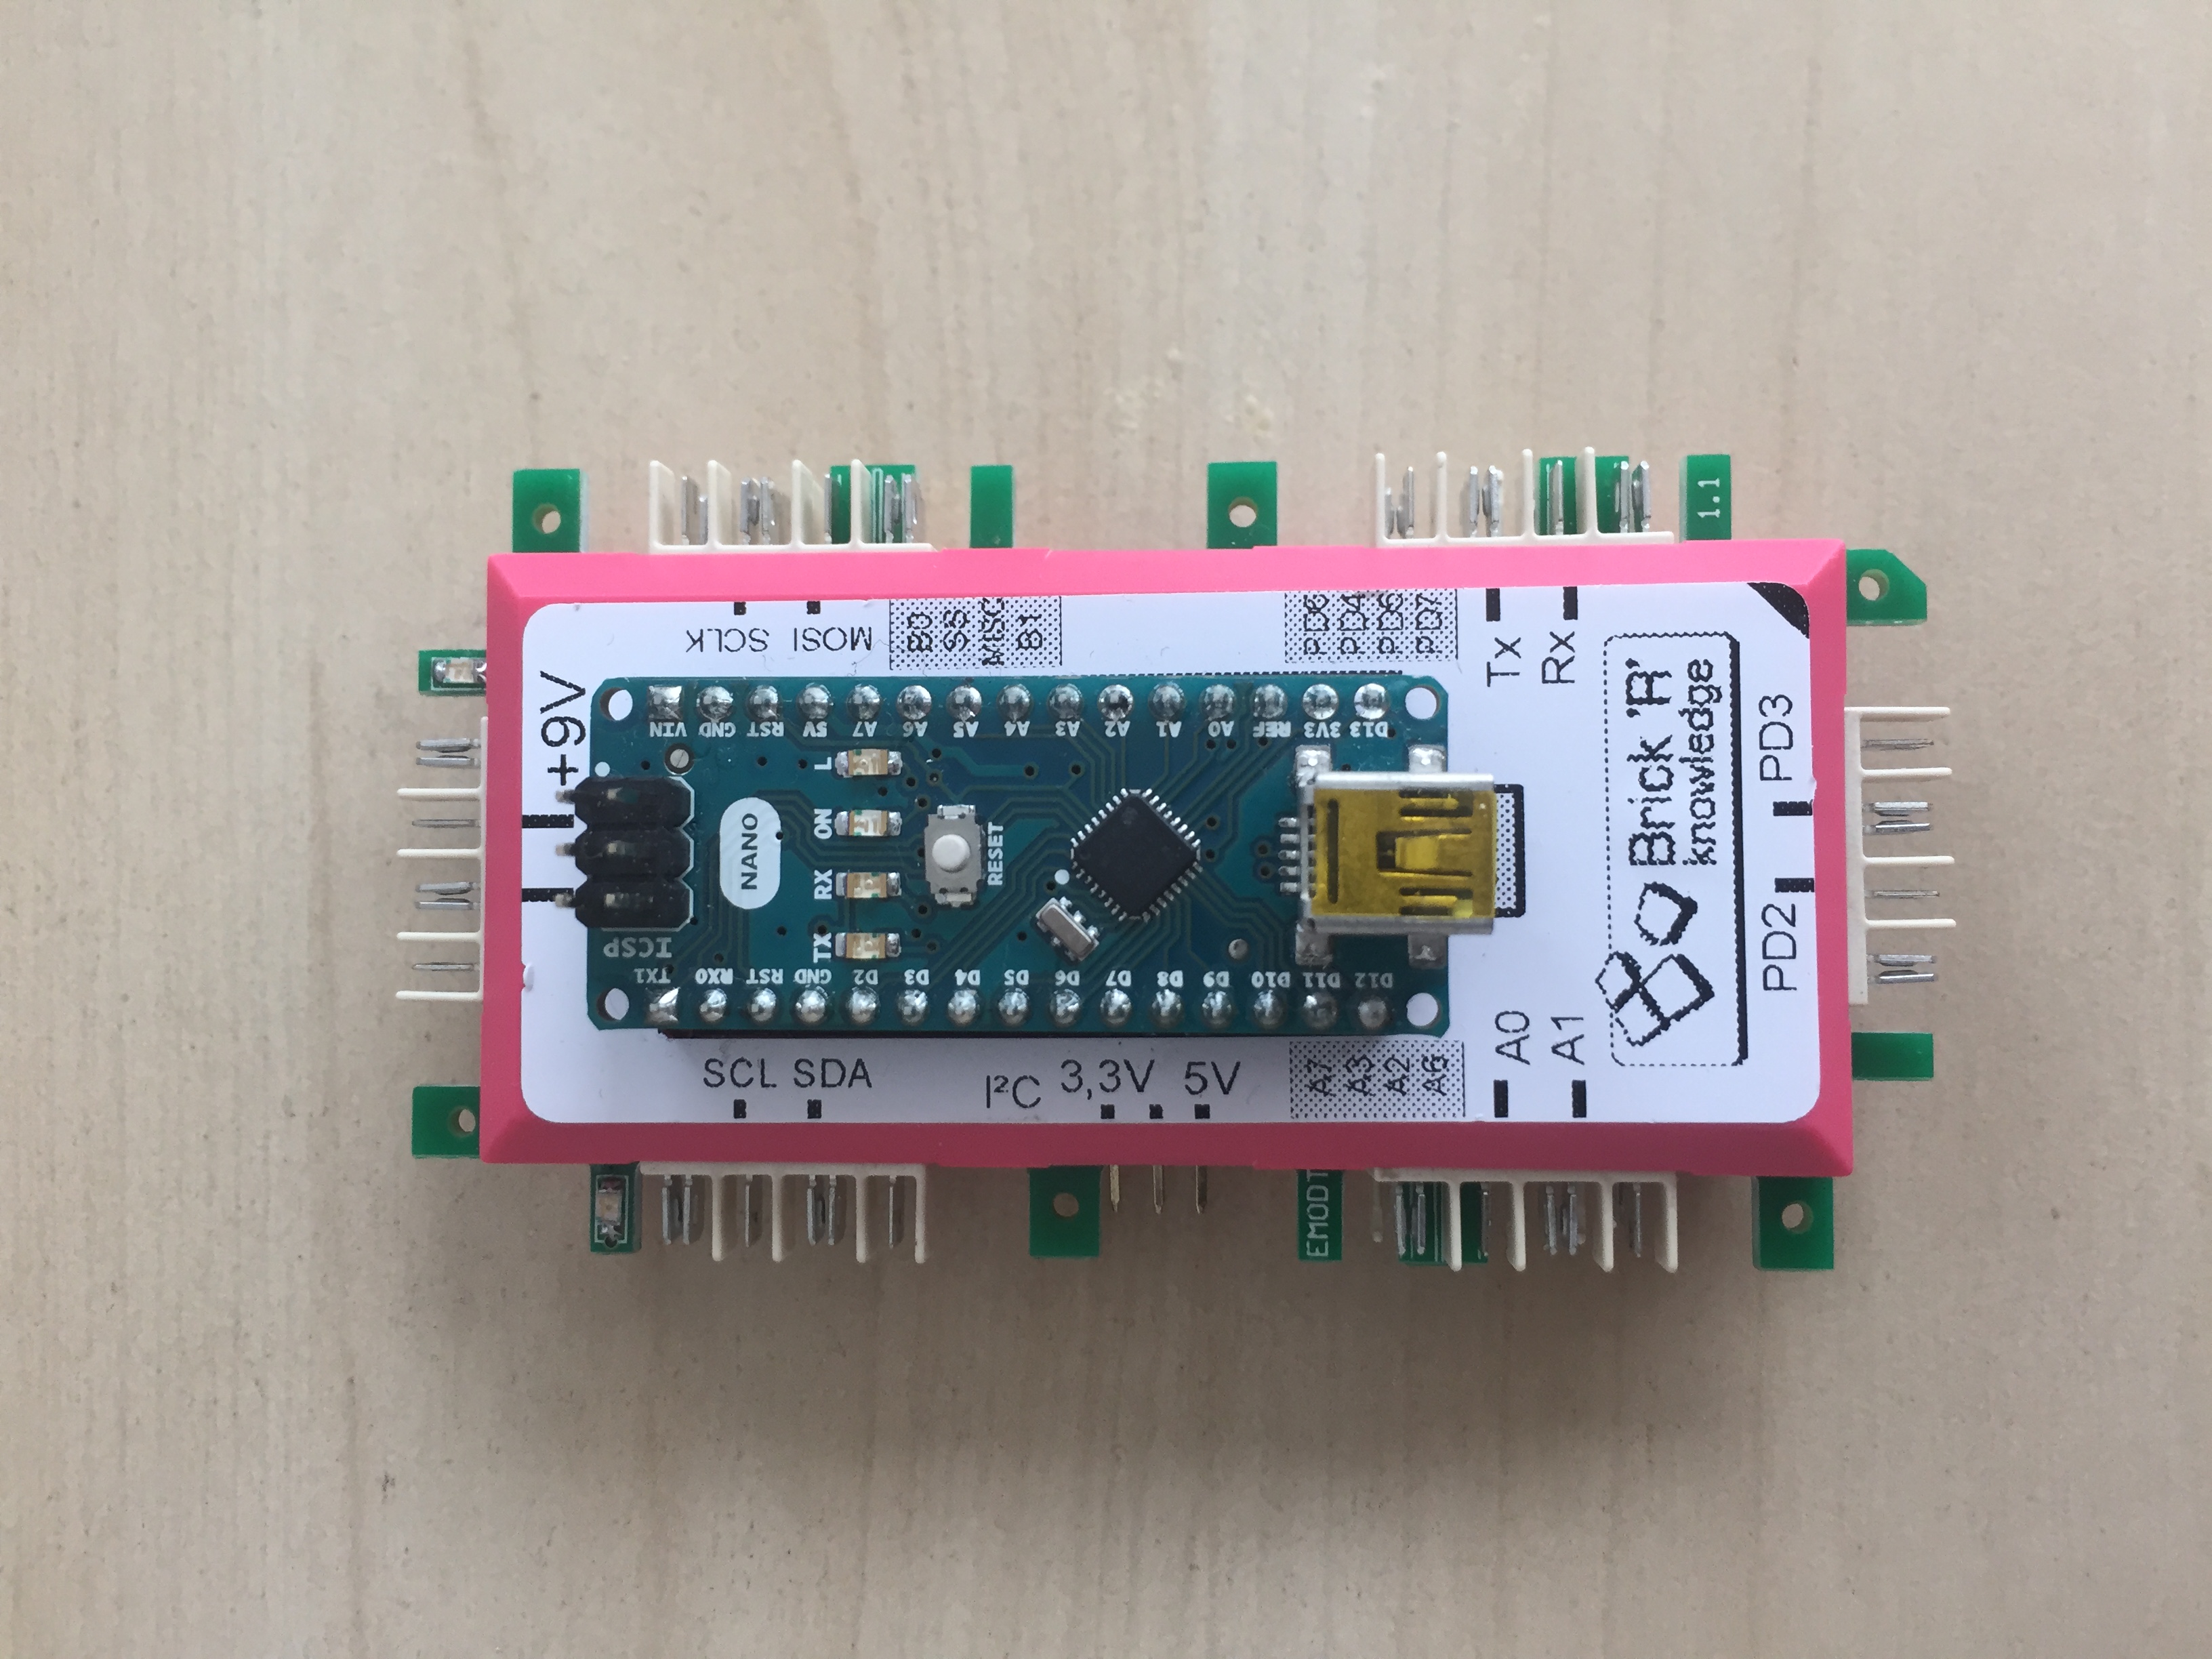
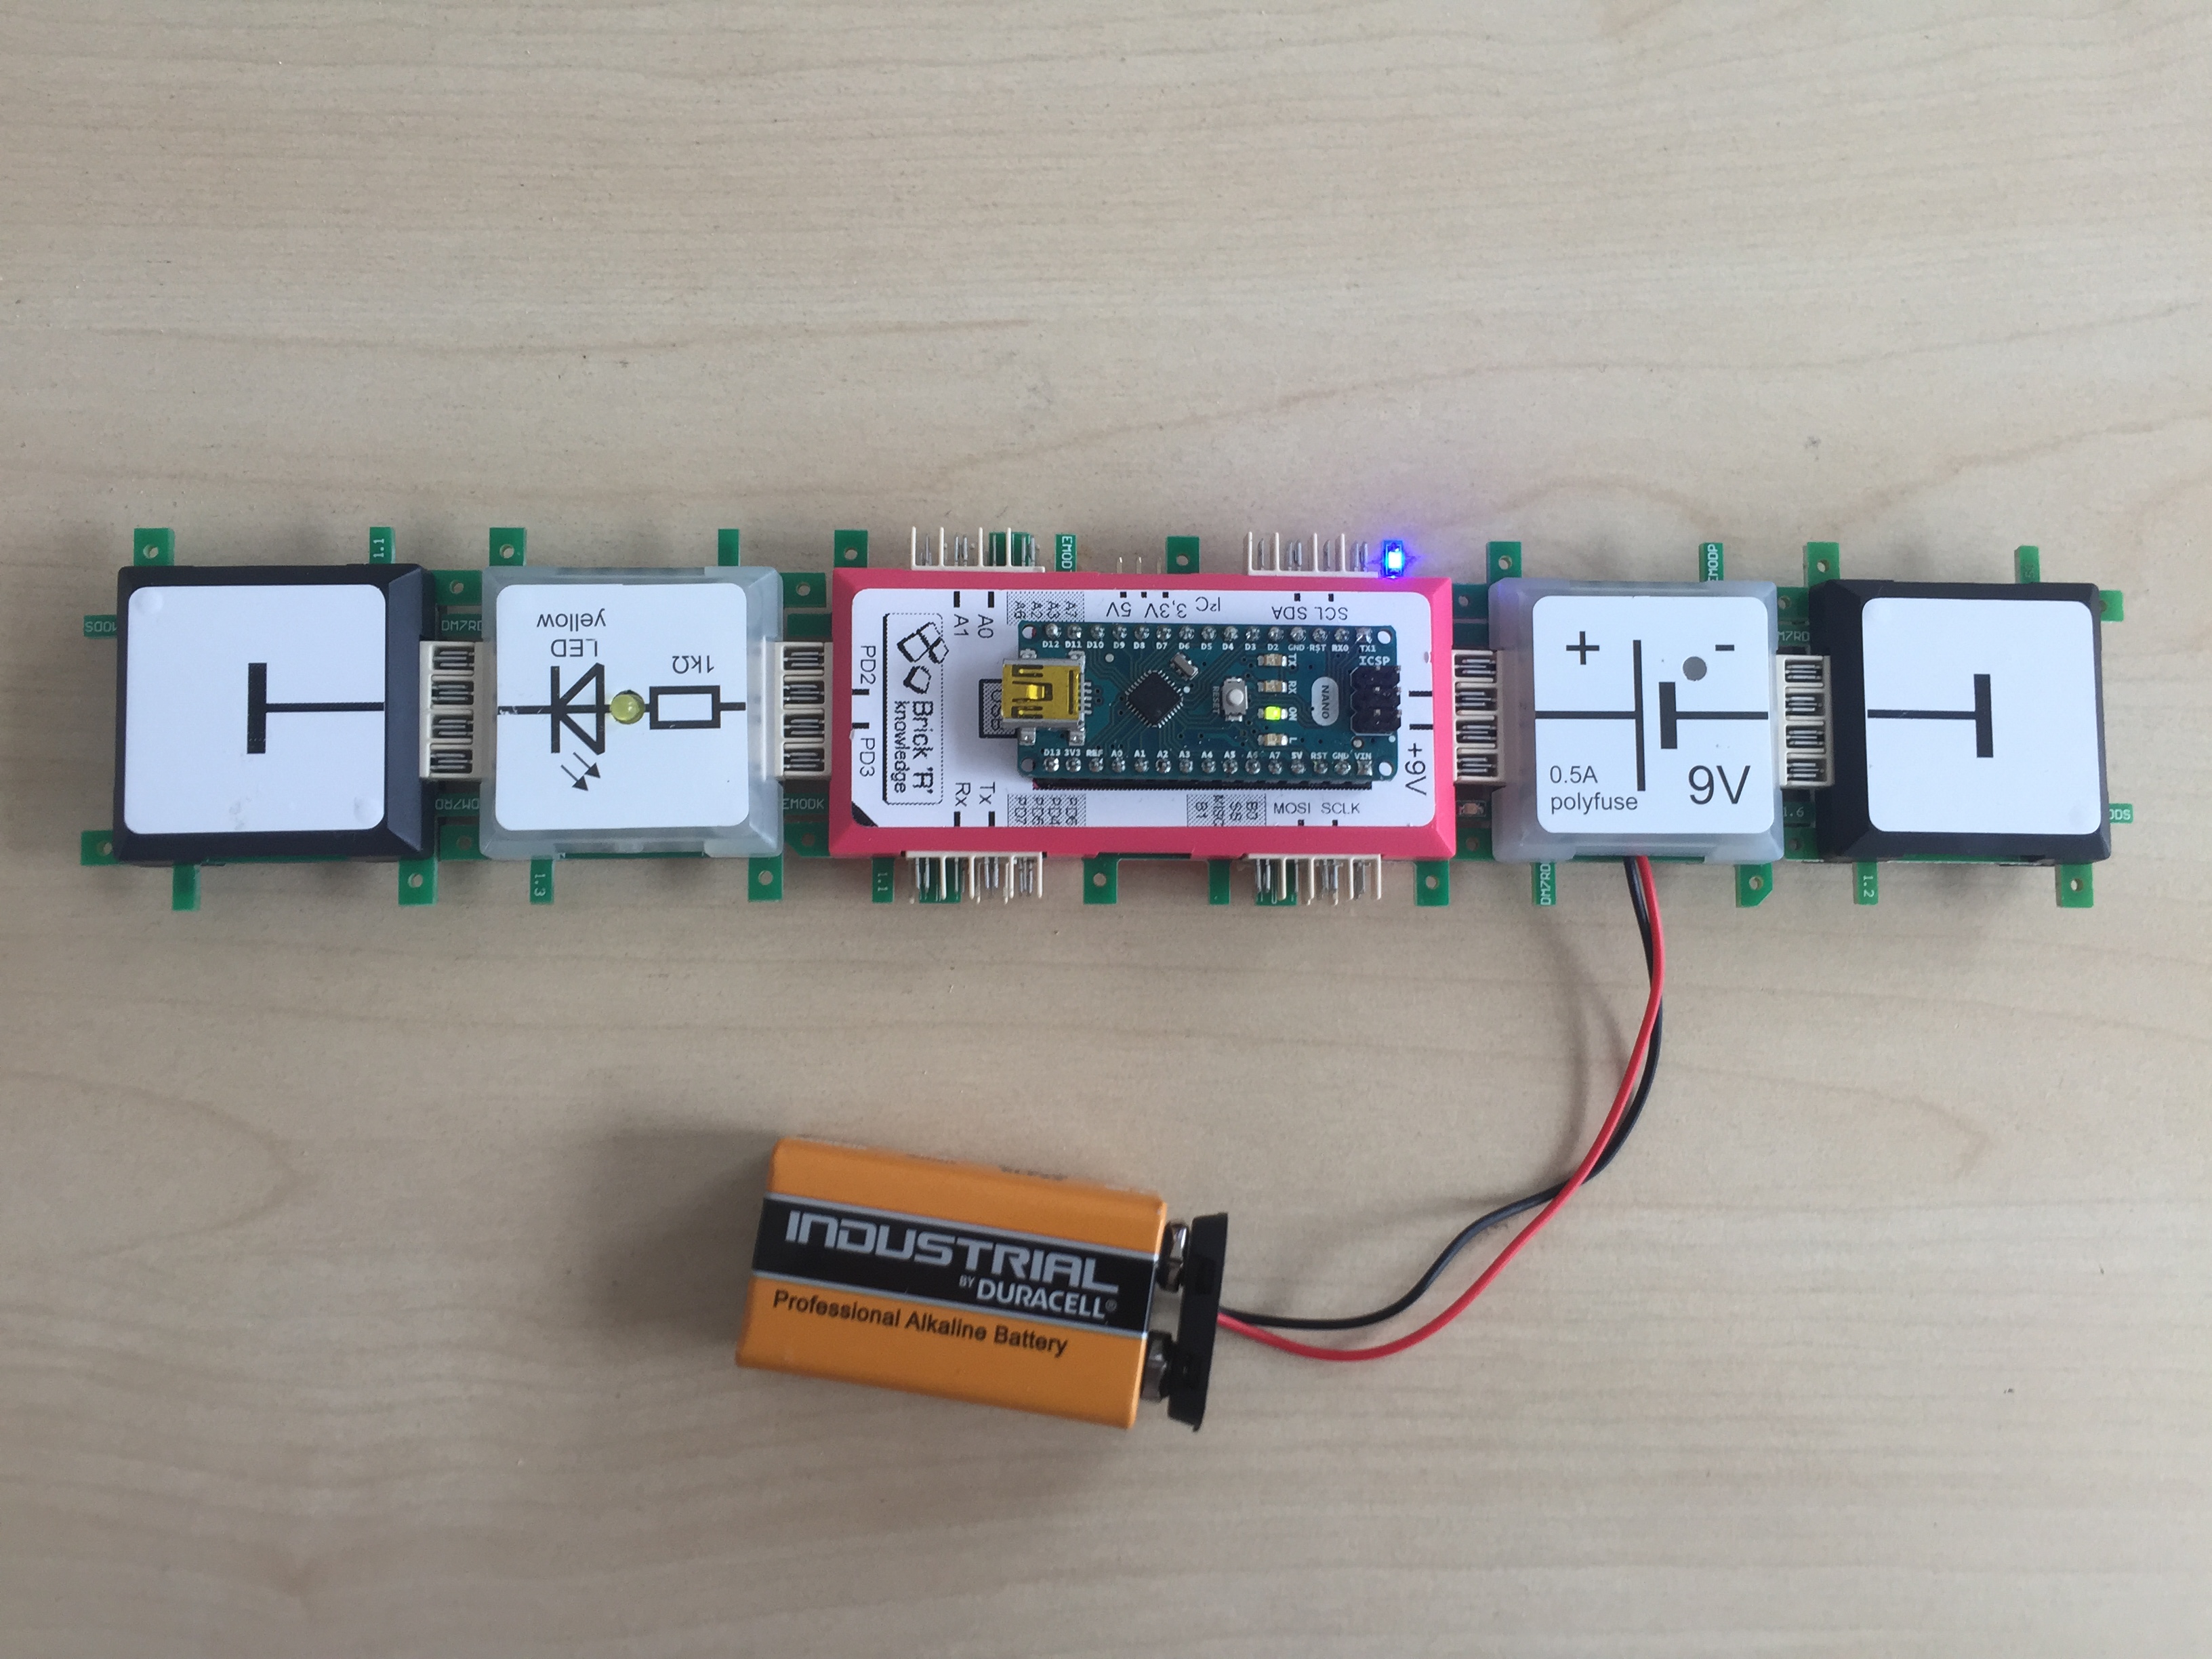
First, you connect the battery brick to the adapter. On the Arduino PCB there is a mini USB connector that connects the Arduino with the computer or laptop. Additionally, there are hermaphrodite connectors (you don’t need to remember that one ;)). When we connect different bricks to the adapter, it is as if we connected them directly to the Arduino Nano’s pins. Today, we’ll only have a look at two connectors, namely, the digital “PD2 and PD3” that are equivalent to the Arduino pins 2 and 3. We could actually address these pins individually, that means, we could connect a double-LED to the connector. As we will be working only with a normal LED, however, we just connect pin 2 and 3, that means, we address them both.
On some parts of the Arduino adapter, you might connect the brick in a different direction – for this you need an extra brick. Today, we don’t go deeper into that topic, though.
Now we open our browser, type www.arduino.org and click on download. You can choose the adequate operating system (on my PC it would be “Windows installer”, for example) and you can download the file. As usual, you will have to click “accept” several times and…. we are all set and prepared.
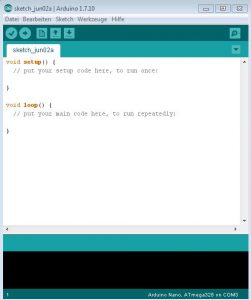
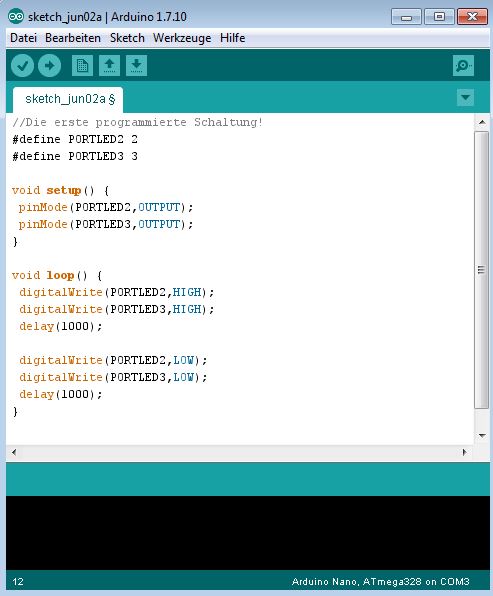
You can see this picture now. It is the program we use to write a code. First, we click on “tools”, then on “board” and then we chose our Arduino Nano.
As I mentioned before, I’m not a programmer which is why I explain the starting situation like this:
void setup: This is the preparation for the following implementation. What is insider here is the starting situation before any other processes or loops begin.
void loop: After the setup has been worked through, everything that is in here will be played in an endless loop. For example: Light on, light off, light on, light off and so on.
{} : Everything that is between these two brackets will be repeated in a loop. Here you have to fill in the content and the brackets define the beginning and the end.
; The semicolon serves as a division between different instructions. Like this, the program know how the code’s different parts are separated. It works like a full stop in a text.
//: Here you can add your own single-line comments for yourself.
The individual parts of our code:
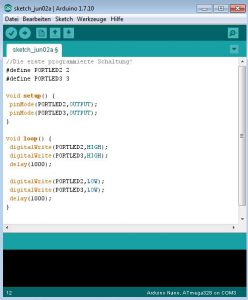
First, we name our ports. PD2 is called “PORTLED2” and PD3 ist called “PORTLED3”. For our program to know to which pins PORLED2 corresponds to, we tell it the following:
#define PORTLED2 2
We do the same for PORTLED3.
We define the starting situation void setup now. It works like this:
pinMode(PORTLED2,OUTPUT);
The program knows now that PORTLED2 is supposed to be an output and not an input.
Now follows what I like best: the endless loop called void loop. The pins that we’ll use are digital pins which is why we write:
digitalWrite(PORTLED2,HIGH);
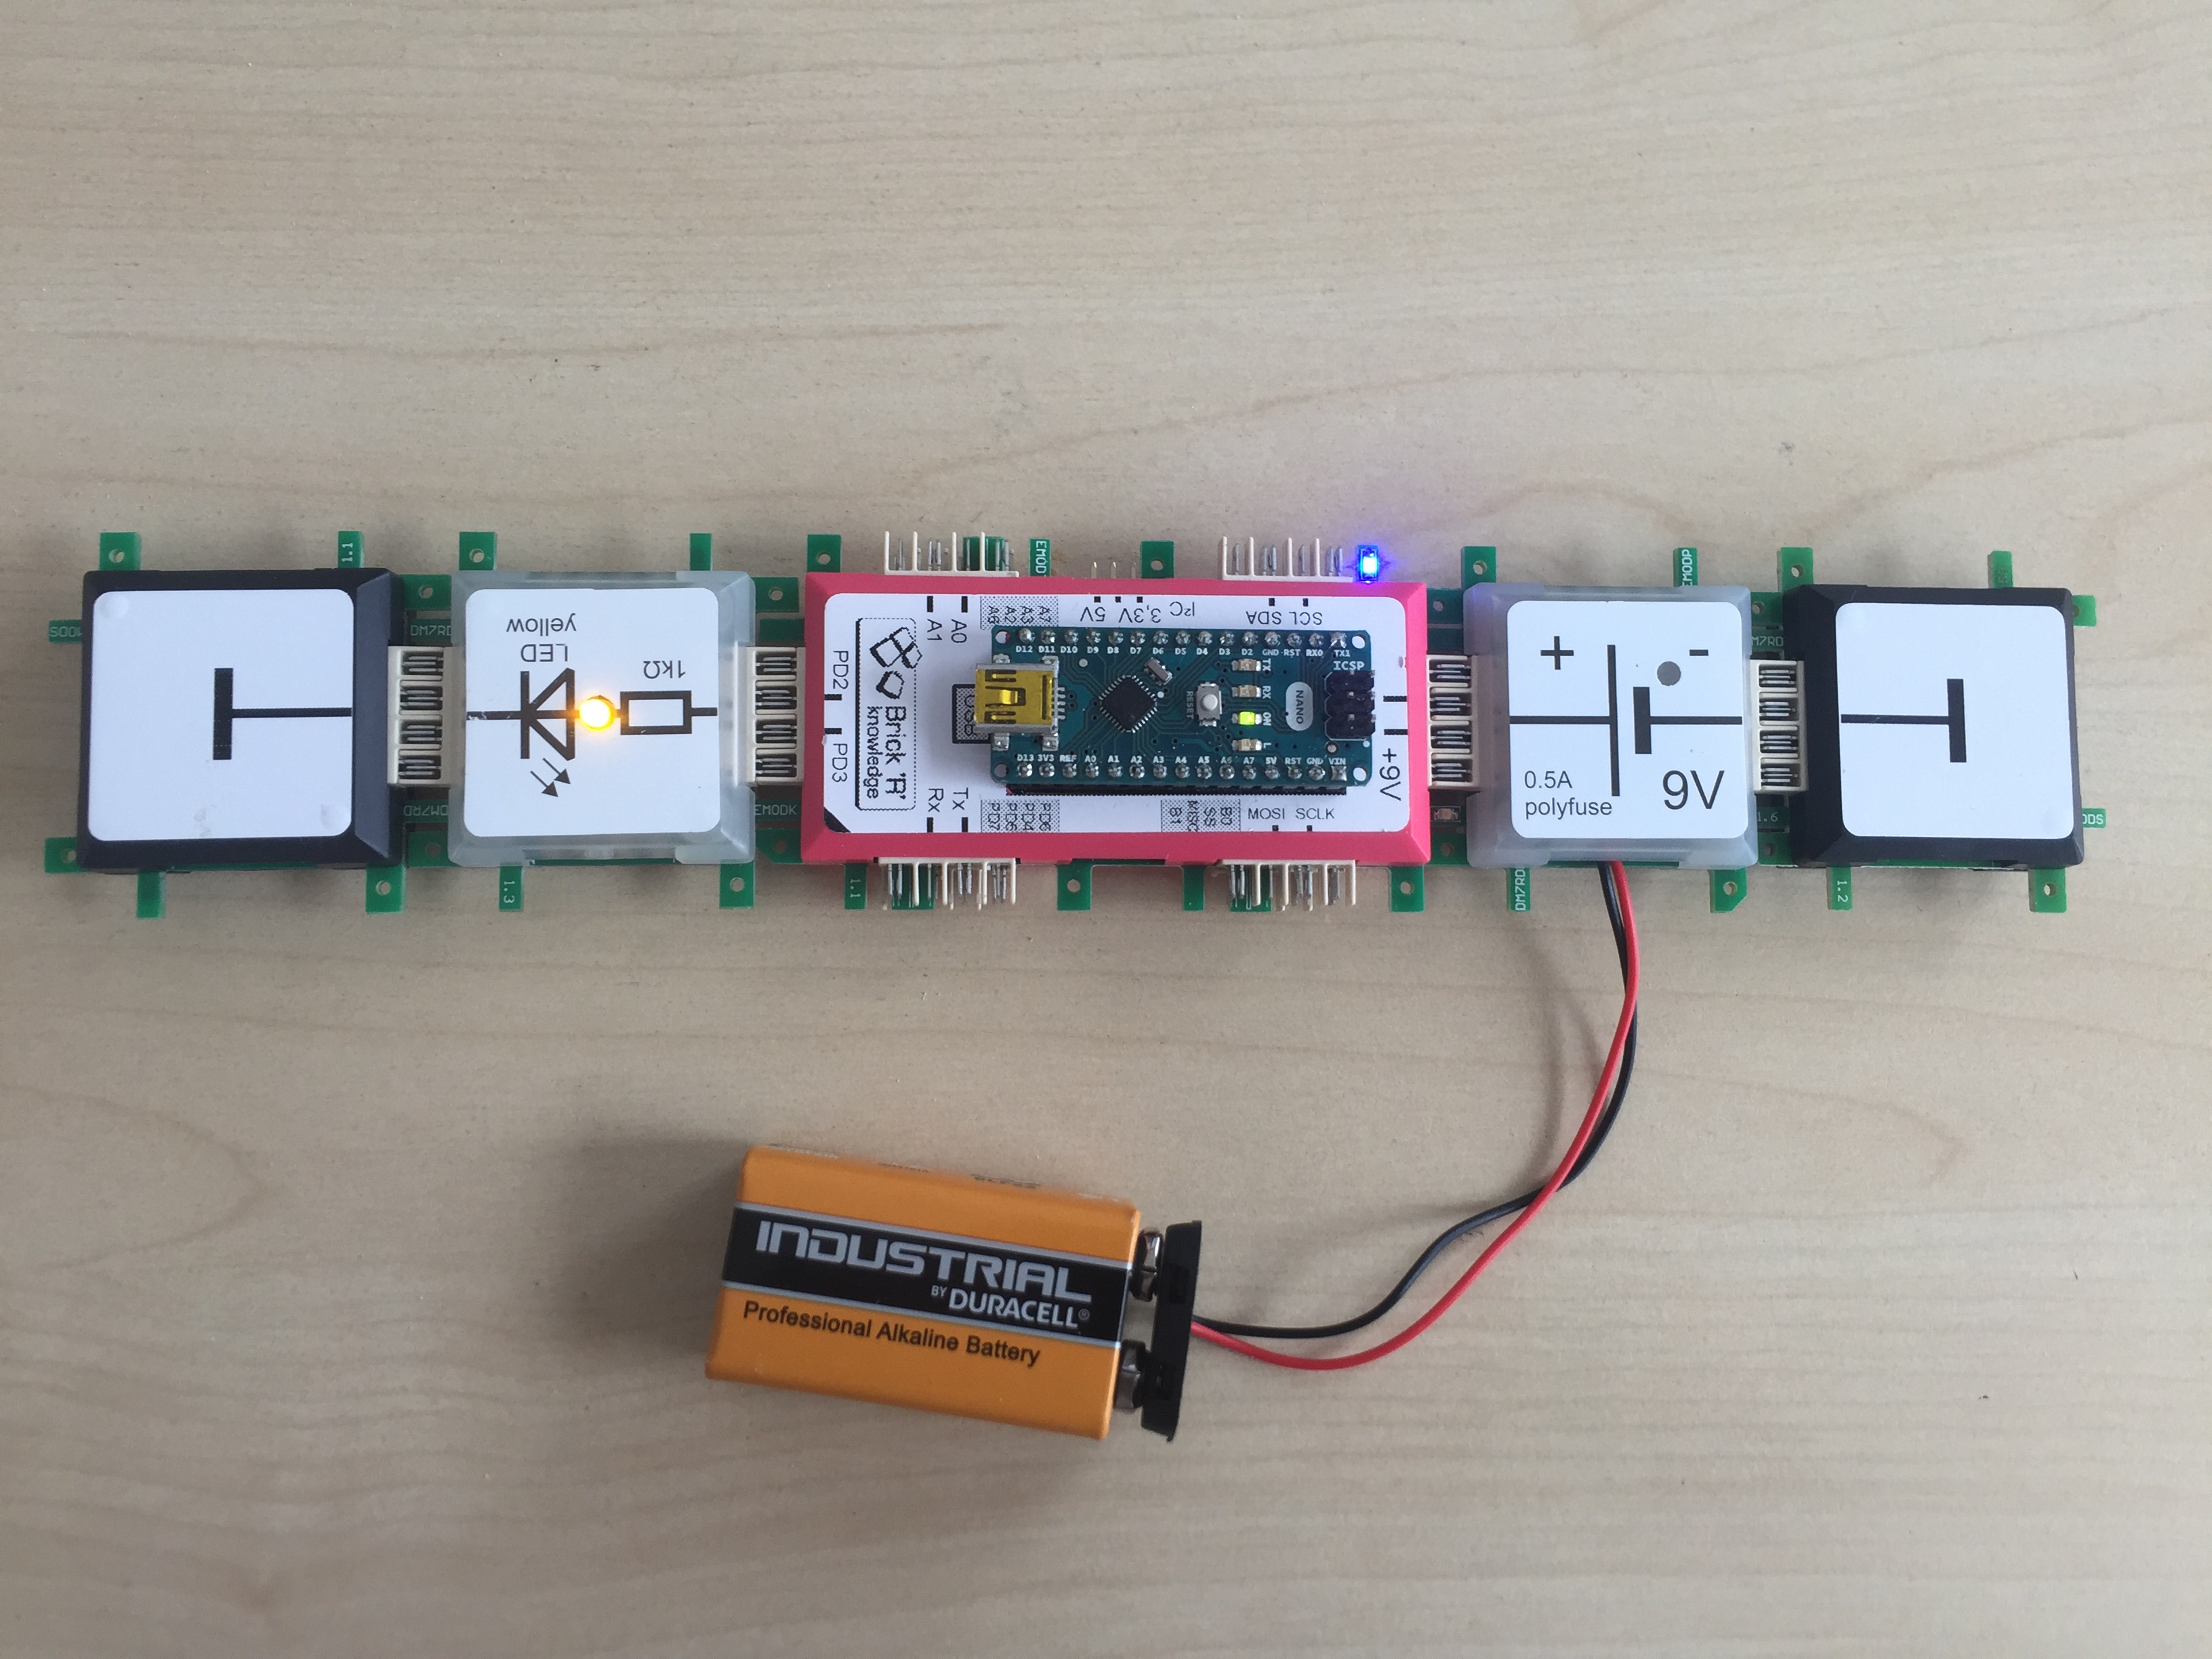
digitalWrite(PORTLED3,HIGH);Both LEDs are switched on to a high level or as I would say: they are illuminated.
As a next step we need to define how long they are supposed to be illuminated. For one second, we have to write 1000, that means, we calculate in milliseconds. When the LED should be illuminated for one second you need to write:
delay(1000);
When the LED should not be illuminated for one second you only need to change HIGH to LOW:
digitalWrite(PORTLED2,LOW);
digitalWrite(PORTLED3,LOW);delay(1000);
At the end, our loop will be closed with a brick and we managed to coder our very first circuit.
Now we connect the Arduino Nano via the USB to our computer or laptop and click on the checkmark on the left that cause the code to be compiled. That means it tests whether we made any mistakes. Once compiling has been completed we click on the arrow symbol next to the checkmark and our code will be uploaded to the Arduino Nano. When we take it off again and connect our bricks correctly the LED will lighten up every second.